Bow Drill Fire in the Pacific Northwest
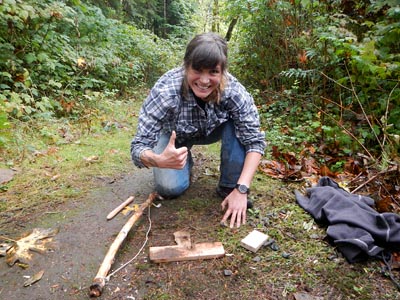
By Gabe Garms
They say that if you can succeed with a bow drill fire in the winter months in the Pacific Northwest, then you can succeed at it almost anywhere else in the world. Winters here are extremely wet, making finding and prepping material for a friction fire an incredibly difficult task. But fear not, I'll walk you through the process that I use which I've found to be rather dependable.
Throughout this article, I'll only be talking about using the bow drill fire method, due to it being the most efficient means of getting a coal when you're using damp wood. I'll also assume that you are familiar with how to make a bow drill fire (if not, refer to https://www.wildernesscollege.com/bow-and-drill.html) and have some cordage and a knife with you so that you can easily put together your bow and carve out your kit. With all of that behind us, let's get started.
You'll need to collect 3 items: a tinder bundle, the fire kit (spindle and fire board which are usually taken from the same piece of wood) and first level kindling. I'll go over all three as well as the process of getting a coal.
TINDER BUNDLE:
When I first got started with wild bow drill fire kits during the winter months, I'd focus all of my energy on the fire kit itself (fire board and spindle) and focus very little on my tinder bundle. Let me tell you, there's nothing worse than spending a tremendous amount of energy on getting your coal and then not being able to blow it into flame because the tinder is either too moist, dense or both.
Essentially, you’re looking for whatever dry/semi-dry material that's available to you on the landscape (cottonwood bark, cedar bark, dried grasses, mosses etc.). Often times I’ll grab multiple tinder sources, break them apart as much as possible to create a lot of surface area (which speeds up the drying process), and I put them close to my body (without actually touching the skin). In doing so I use my body heat to remove whatever moisture is still present in the tinder. That's why the tinder bundle is one of the first things that I'm trying to acquire in a survival situation, so that I can most efficiently use the body heat that I'm generating from completing all of the other bow drill fire tasks.
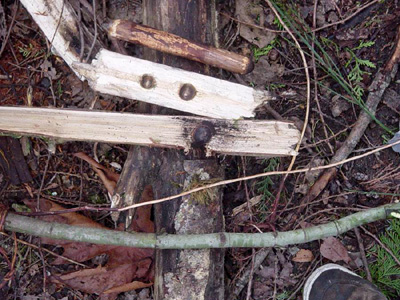
FIRE KIT:
Great places to look for material are underneath downed trees and old stumps (which are protected from the rain) for dry, soft wood which is dead. Also any wood suspended in the air or low hanging branches work great. While one of my favorite woods is western red cedar (Thuja plicata), many of these trees have been logged due to their commercial value. One tree which we have plenty of here in western Washington is red alder (Alnus rubra), and that is what I encourage my students to use because it's practically everywhere (aspen and poplar are some of my other favorites in case alders aren't available).
Just like my tinder bundle, I'm putting the board that I select for my fire kit against my body to dry it out. I usually take things a step further in really wet weather and actually carve out my notch and spindle before I put them against my body so that I’m not wasting precious body heat drying wood that I’m going to carve off anyway later on.
Be More Prepared For Your Next Outdoor Adventure!

Don't leave without knowing these six essential survival skills. Our free survival mini guide reveals the strategies of:
- Shelter & fire to prevent the number one cause of death
- Obtaining clean water to avoid life-threatening dehydration
- Common wild survival foods and other critical skills!

FIRST LEVEL KINDLING:
By first level kindling, I mean the the first layer of wood that will be exposed to the flame generated by your tinder bundle. You're looking for the thinnest diameter wood available to you on the landscape. The thinner the wood, the quicker it'll dry out and take a flame. I typically use 5-10 times as much first level kindling in the wetter months than I do during the summer. If you don't, your fire will more than likely go out. You need to generate a lot of heat using many thin branches so that the larger pieces have enough time to dry out. I dry out the thicker wood by building them into a wall surrounding the fire. This method, called an eagle's nest, not only dries out the wood effectively but also traps heat in the area as well.
Just as I do with all of the elements in my kit, I'll dry my kindling with my body heat. The wispy branches of the western hemlock tree are my personal favorite when it comes to first level kindling. They're so readily available in my region and I've never found any other branch to be thinner in diameter. Whatever you decide to use just make sure it's the thinnest diameter wood available.
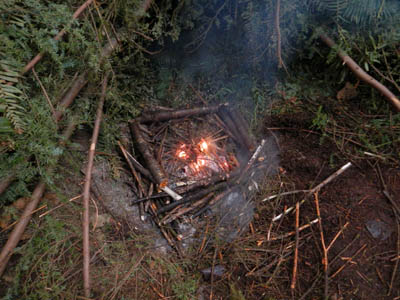
GETTING THE COAL:
Finally, when it’s actually time to get a coal, I’ve found only one method which works fairly consistently. Once my notch is carved, I begin to bow slowly until I see smoke and then stop. By stopping as soon as I see smoke, I'm actually generating enough heat to evaporate the water from the wood but not enough to turn the wood into dust. I repeat the same process between 15-20 times (depending on the dampness of the wood) before I begin my final push. After 20 or so tries, I'll build up the dust pile and go as fast as I can until the dust ignites into a coal. Try it, it works!
Once you've lit up your bundle and got your kindling going, add slightly thicker dimensional wood until your coal base is large enough to burn your larger wood (which should be configured in an eagle's nest around the fire) which will warm you throughout the night.
In the end, a wild bow drill fire is a lesson in humility and takes practice to become proficient at. So instead of sitting inside and sipping cocoa this winter, put on some rain gear and get out there and practice wet weather bow drill fire. It may pay off when you need it most. And as always, be safe out there!
By the way, if you enjoyed this article then you'll love our survival mini guide. You'll discover six key strategies to staying alive in the outdoors plus often-overlooked survival tips. We're currently giving away free copies here.
Additional Resources:
Learn fire skills at Alderleaf's Wilderness Survival Courses.
Read additional bow drill articles on Wildwoodsurvival.com.

About the Author: Gabe Garms is passionate about permaculture, ethnobotany, birding, and wilderness survival. He wrote several articles while teaching at Alderleaf. Learn more about Gabe Garms.
Return from Bow Drill Fire back to Wilderness Survival Articles
Is The Essential Wilderness Survival Skills Course Right for You? Take the "Online Survival Training Readiness" Quiz
See for yourself if this eye-opening course is a good fit for you. It takes just a few minutes! Get your Survival Training Readiness Score Now!
Grow Your Outdoor Skills! Get monthly updates on new wilderness skills, upcoming courses, and special opportunities. Join the free Alderleaf eNews and as a welcome gift you'll get a copy of our Mini Survival Guide.
 The Six Keys to Survival: Get a free copy of our survival mini-guide and monthly tips!
Learn more
Wait. Before you leave...
Don't forget your Survival Mini Guide.
It's free.
Be more prepared for your next outdoor adventure! Discover six essential survival skills. Join our newsletter and get a free copy of the guide as a welcome gift!
Your privacy is our top priority. We promise to keep your email safe!