Survival Fish Trap
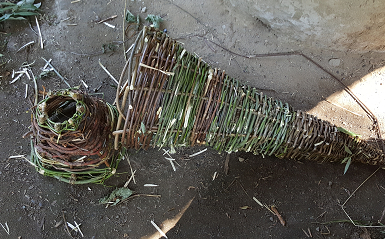
This survival fish trap is a very old method for catching fish. Primitive traps like this can work all day and night for you while you conserve energy and manage other tasks in a survival situation.
The method that I will be presenting in this article is a tried and true design. It is basically a small cone within a large cone. The practice is a simple one, and often when we keep things simple they tend to work well.
In this article we will look at the different steps to make this survival fish trap, then the how-to of actively using the trap to collect fish.
How to Build the Survival Fish Trap:
The first step is to collect the materials to make the trap. The main pieces of this survival fish trap consist of branches of two different diameters. One group is about as thick as your index finger or thumb. The other group of branches needs to be a thinner diameter, smaller than your pinky finger, and very flexible.
You will also need some form of cordage to bind all of the sticks together. The larger sticks will be the skeleton of the trap (also called warps). The thinner more flexible sticks will be what we weave though the larger sticks to create the structure of the trap (also called wefts).
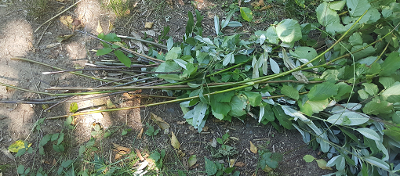 harvested branches for the warps and wefts
I used a bunch of different plant species for this trap. The species that I am using are beaked hazelnut (Corylus cornuta), vine maple (Acer circinatum), Indian plum (Oemleria cerasiformis), willow (Salix spp.), and red osier dogwood (Cornus sericea).
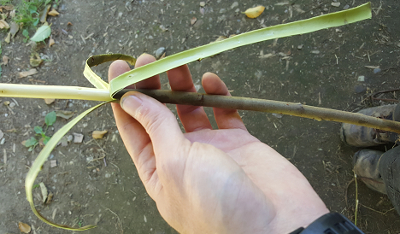 willow bark cordage
The cordage that I am using is bark from a willow. I cut a branch of willow and slowly peeled the bark off.
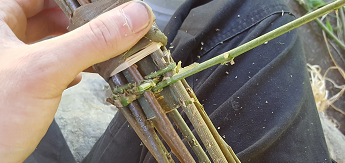
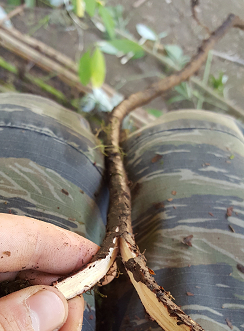
 branches with leaves removed
After all the parts are collected the first step is to bind the thin ends of the vertical pieces (aka warps) to a chunk of wood that acts like a cap. It is important to use an uneven number. Here I am using nine. An even number will result in an improper weave.
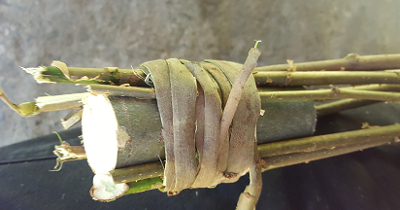 binding branches at one end with a chunk of wood and cordage
Once the verticals (warps) are bound securely to the cap then it is time to start weaving in the weavers (aka wefts). The weaving pattern is very simple: under, over, under, over, etc as you weave your way around the warps.
 beginning to weave
The ends of the weavers can just be bent and tucked into the previous weaves. When one weaver ends, just place the next weaver right where the last one ended and continue. I like to start with the skinny end of the weavers.
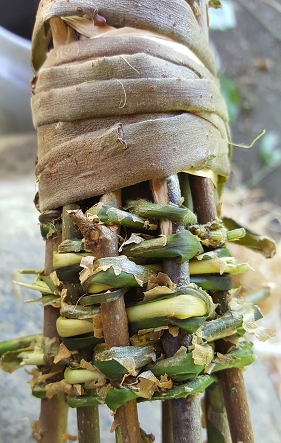 weaving pattern
After the base of the trap has been woven a number of times, I then create a ring and secure it half way up the verticals. This is done to open the trap up a bit, and to give it the right shape.
 creating a ring
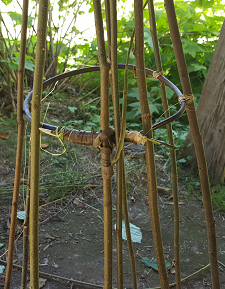 adding the ring
Keep on weaving!
 continuing the weaving
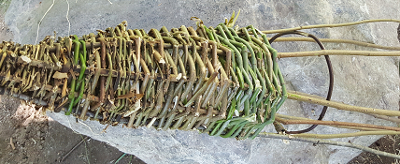
Pick a desired total length. In this case I chose about two and a half feet.
 this section is about two and half feet long now
Once the total length is achieved bend the frame pieces (warps) over and jam them down into the weavers. This will add some structural stability.
 bending the warps down into the weavers
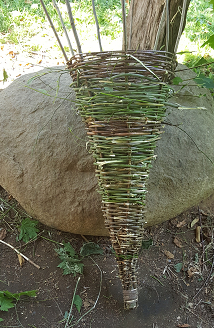
After the first cone is complete it is time to start on the smaller cone. This smaller cone sits inside the larger cone. This creates a choke point and makes it very difficult for the fish to find their way out.
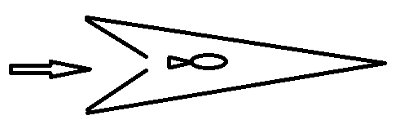 diagram of the two cones
The first step to making the smaller cone is to form two circles out of flexible branches. Theses circles need to be sized correctly. The larger of the two needs to fit just inside the big cone. And the smaller circle is approximately three inches in diameter.
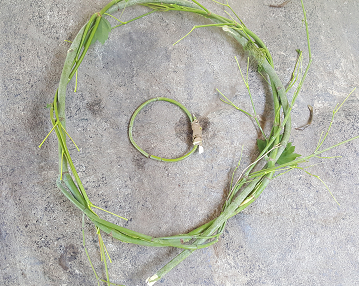 two circles for the second cone
The two circles pictured above are made in two different ways. The larger circle is a piece of vine maple twisted around on itself. This is very easy to accomplish and no cordage is needed. The small circle is another piece of vine maple and it is bound together with some willow bark.
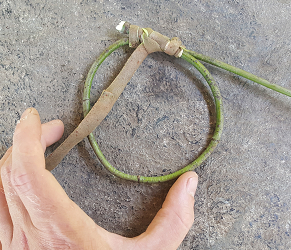 smaller circle bound with bark cordage
Once the circles are complete it is time to attach the verticals. I fixed them to the larger circle first with willow bark and raffia fibers.
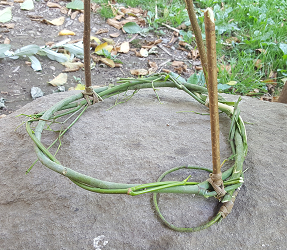 starting to add verticals (warps)
Remember to make the number of verticals an odd number (if you don’t then the weave won’t come out right).
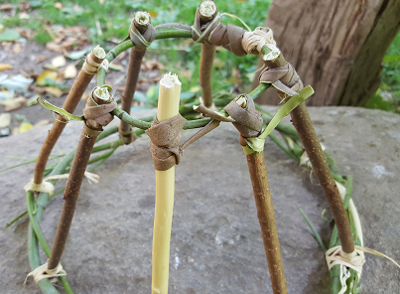 verticals completed on smaller cone
Be More Prepared For Your Next Outdoor Adventure!

Don't leave without knowing these six essential survival skills. Our free survival mini guide reveals the strategies of:
- Shelter & fire to prevent the number one cause of death
- Obtaining clean water to avoid life-threatening dehydration
- Common wild survival foods and other critical skills!

For weavers (wefts) for this smaller cone I used many of the same plant species I mentioned above. I also used roots from a red cedar tree. I walked down to a creek and found a place where the water had eroded away the bank, exposing the roots. After I harvested them I very carefully split them in half and weaved them into the cone.
 splitting cedar roots
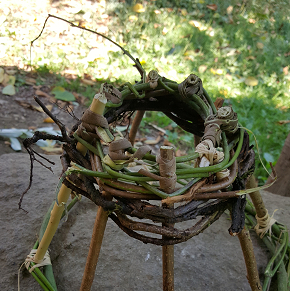 weaving the smaller conecompleted cones
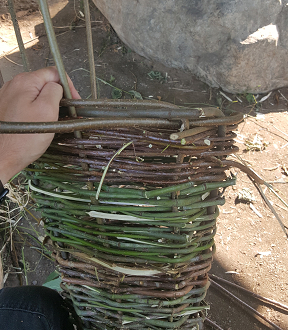
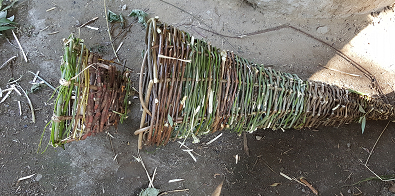 fitting the small cone into the large cone
Once the smaller cone is completed you are ready to try to catch some fish!
How to Use the Survival Fish Trap:
This trap works well as a baited trap in still waters.
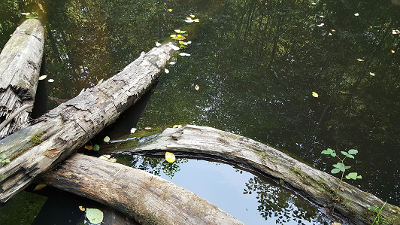 a still pond to put the baited trap into
You would want to take whatever bait you might have and place it inside the larger cone.
Some people will tie the bait inside so that it is suspended. This is done in case something is crafty enough to pull the bait out from the outside.
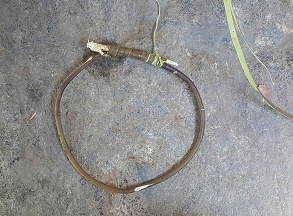
If you place this trap down into deep water don’t forget to tie on a piece of cordage that is long enough so you can retrieve the trap.
 small sunfish used as bait
This trap can also be used un-baited. The un-baited setup is a little more time consuming but it works in creeks and rivers.
The idea is to block a section of the creek and leave a small opening where the trap is placed. The hope is that fish moving down stream will be funneled into the trap.
To improve your chances, you can go up-steam along the bank and then get into the creek and walk down the creek making a bunch of disturbance in the water as you go. Oftentimes this pushes fish into the trap.
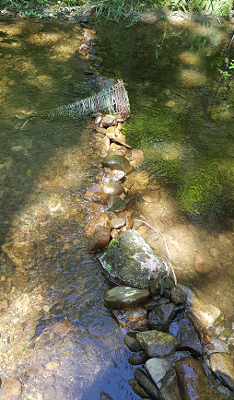 un-baited fish trap placed in a creek
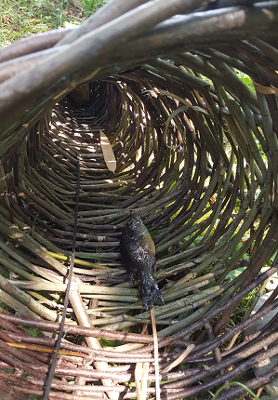
I placed this survival fish trap in a creek for a day and night, and tried to push some fish downstream. I didn’t catch any fish though I did catch a couple of crayfish!
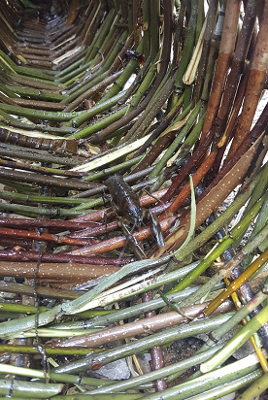 crayfish caught in the trap
The weaving techniques used to make this survival fish trap can be an easy way to make a container that can catch your lunch. The techniques are also a good way to make a basket or even to make a fence.
Another consideration is the legal aspect of primitive traps. In many places primitive trapping is only legal in real survival situations. It’s always a good idea to check the regulations in your area. There’s often less regulation for catching invasive fish species or fish stocked into ponds on private property.
Happy fishing!
By the way, if you enjoyed this article then you'll love our survival mini guide. You'll discover six key strategies to staying alive in the outdoors plus often-overlooked survival tips. We're currently giving away free copies here.
Interested in learning more survival skills like the fish trap? Check out our Wilderness Survival Courses.
Learn about the history of survival fish traps on Wikipedia.

About the Author: Russell Field is a well-rounded naturalist with a passion for bushcraft and flintknapping. He was an instructor at Alderleaf. Learn more about Russell Field.
Return from Survival Fish Trap back to Wilderness Survival Articles
Is The Essential Wilderness Survival Skills Course Right for You? Take the "Online Survival Training Readiness" Quiz
See for yourself if this eye-opening course is a good fit for you. It takes just a few minutes! Get your Survival Training Readiness Score Now!
Grow Your Outdoor Skills! Get monthly updates on new wilderness skills, upcoming courses, and special opportunities. Join the free Alderleaf eNews and as a welcome gift you'll get a copy of our Mini Survival Guide.
 The Six Keys to Survival: Get a free copy of our survival mini-guide and monthly tips!
Learn more
Wait. Before you leave...
Don't forget your Survival Mini Guide.
It's free.
Be more prepared for your next outdoor adventure! Discover six essential survival skills. Join our newsletter and get a free copy of the guide as a welcome gift!
Your privacy is our top priority. We promise to keep your email safe!