Survival Fire Starters
Survival fire starters can be an incredibly important tool out in the wilderness, which is why it is vital that you include several of them in any emergency kit you plan to use in the outdoors. There are many different types of survival fire starters to choose from and each have their own merits and flaws. Always carry at least 3 different ways to start a fire. That way, if one or two methods fail you have a backup system in place. Fire can be used to boil water, cook food, signal rescuers, warm a shelter and provide you with a psychological boost.
When discussing survival fire starters, I generally divide them into two categories: igniters and accelerants. Igniters provide the initial flame or heat. Accelerants help a small flame grow into a larger blaze.
I’ll discuss igniters first, from the most primitive to the most modern.
Survival Fire Starters: Igniters
1. Wood Friction Fire (Bowdrill, Hand Drill, Fire Plow, Fire Saw)
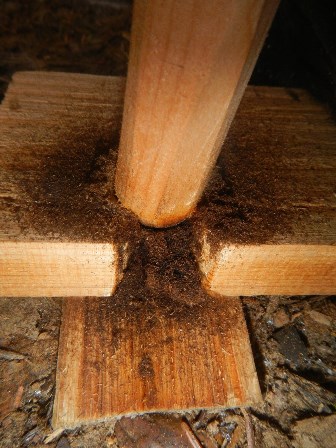
These are, as far as we know, the oldest forms of man-made survival fire starters. They all basically exploit a basic property of physics: friction. When two objects are rubbed together, they generate heat. If enough heat is generated, it can cause combustion. Check out our articles on bow and drill fires and handrill fires for more details about using wood friction fire techniques as survival fire starters.
Pros: Wood friction fire techniques require very few tools. With enough skill and practice you can create a bow and drill kit or a handrill kit using just a cutting tool and the local natural resources.
Cons: All of the wood friction fire techniques require a lot of practice to master and they can be very time and energy intensive when attempting them in the field. These problems are compounded in wet environments where finding dry materials is difficult or impossible.
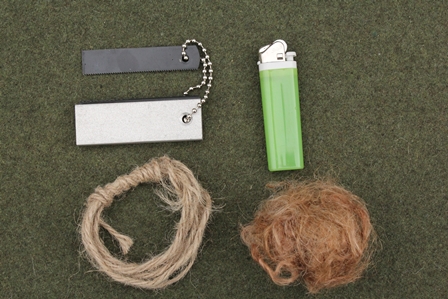
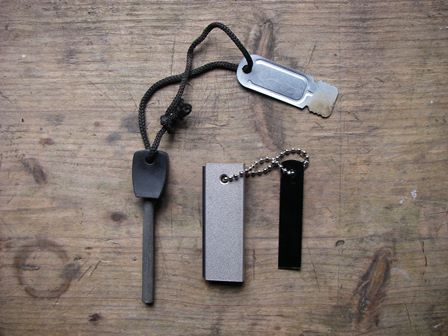
2. Flint and Steel (or Ferro-rod strikers)
These survival fire starters are also very ancient, dating back to the early Iron Age. Even before the discovery of iron, pre-agricultural peoples used iron pyrite to create low temperature sparks through percussion.
As the flint strikes the steel (or iron), it shaves off small pieces of metal that become super-heated by the friction. These sparks can be directed at char cloth or dry tinder to create flame.
Modern versions of the flint and steel use ferrocerium alloy in place of flint. The alloy creates longer burning sparks and creates sparks more readily than flint and steel.
Pros: Flint and steel work regardless of moisture conditions. They are also very light and packable survival fire starters.
Cons: True flint and steel can take a fair amount of technique to use well. It also produces small sparks that can be hard to get to ignite. Ferrocerium strikers are much easier to use and produce large showers of sparks.
3. Fire Piston
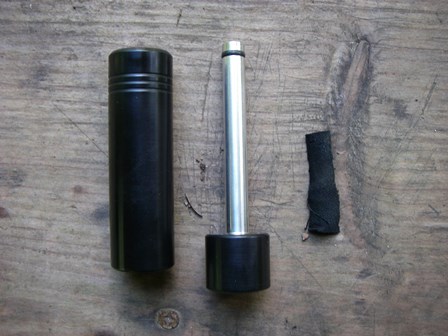
The fire piston (also known as a fire syringe or slam rod fire starter) exploits yet another property of physics: the first law of thermodynamics. The fire piston consists of a thick walled tube with one opening. Tinder (fine, light combustible material) is inserted into the tube. A rod perfectly matching the interior of the tube is then inserted (usually with a seal to prevent any air escaping). When the rod is rapidly depressed, the air inside of the tube is compressed so rapidly that it heats up to ignition point. This is due to the first law of thermodynamics: energy cannot be created or destroyed, it has to go somewhere. The extra kinetic energy from the rod that is unable to compress the air beyond a certain pressure is instead transformed into heat.
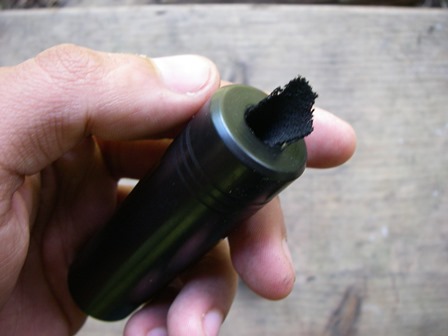
Here a piece of char cloth is placed into a modern aluminum fire piston (historically they were made with bamboo, horn, wood or antlers).
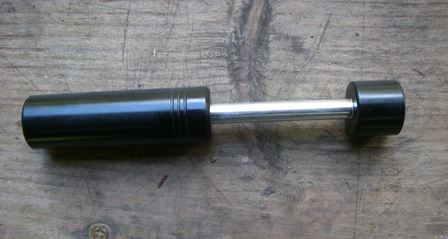
The rod is inserted. Modern fire pistons use rubber gaskets to create an airtight seal. Older versions used animal fat grease to achieve the same effect. A quick, decisive blow is struck to rapidly compress the air inside of the piston. The char cloth is quickly removed before it burns up the small amount of available oxygen inside of the cylinder.
Pros: The fire piston has very few moving parts and it is fairly light and portable. It’s also just cool as all get out!
Cons: If the seal or rubber gasket is compromised in any way the entire device is basically ruined. Also, there is a bit of technique required in striking the piston properly and removing the char cloth quickly enough so that it does not go out. The fire piston is not great for all types of tinder and works best with char cloth.
4. Magnifying Lens
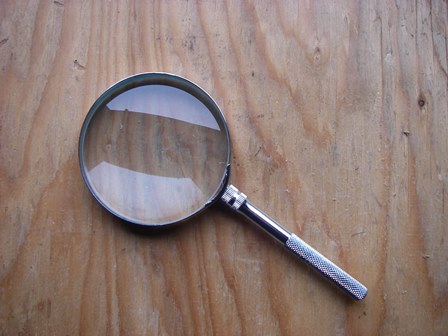
Any clear lens made of glass, plastic or even ice can be used as a survival fire starter to focus the sun’s rays to ignite tinder. This technique requires a nice sunny day and a lens with strong magnification power (a typical magnifying glass or jeweler’s lens works great). Simply hold the lens above the tinder, moving it back until you see a bright white point of light where all of the sun’s rays are being focused. The smaller you can get this point of light the faster it will heat up. Keep the lens still and be patient. You will eventually start to see smoke.
Pros: No moving parts and very little technique and energy output required. Most magnifying lenses are light and portable.
Cons: Requires bright, unobstructed sunlight. These conditions can be rare in some areas of the country and will vary seasonally in all areas of the United States.
5. Matches
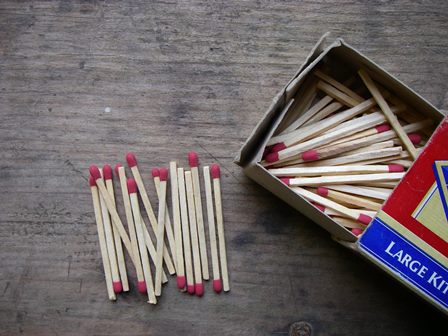
Matches, among all of the survival fire starters, are among the most versatile, reliable and easy to use. They were invented by the Chinese over 1,400 years ago and then slowly spread to other continents through trade. Matches rely on friction to ignite a highly combustible chemical impregnated into the matchstick. Ancient matches used sulfur but modern matches use phosphorous. Most people have used matches in their everyday lives at one point or another, whether to light a cigarette, a stove or a candle during a power outage. Using a match as a survival fire starter requires a little bit more technique than everyday use.
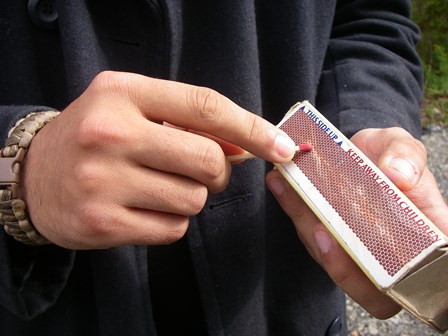
Always support the entire length of the match when striking. This prevents the match stick from breaking.
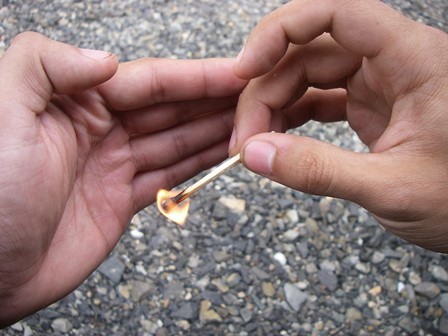
Shield the match flame from wind and weather by cupping your hand around it.
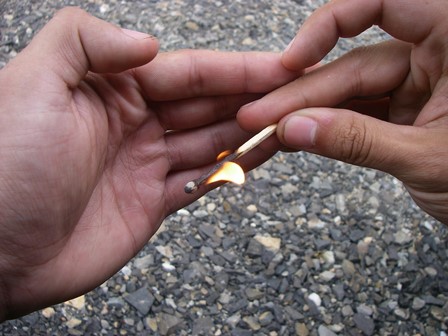
Hold the match at a downward angle so that the flame can climb up onto the match stick. This will help prevent it from going out once the initial phosphorous fuel is consumed.
Pros: Requires very little time, energy or technique. Matches are also very light, cheap and portable.
Cons: Each match is generally only good for one use, so your supply must be replenished periodically. Also, they are easily ruined by moisture. Waterproof matches are available at most camping and outdoor stores and rely on a wax coating to seal out moisture. You can also carry your matches in a waterproof case. ‘Strike anywhere’ matches can also be useful since they do not require a special striking surface like most matches do.
6. Lighter
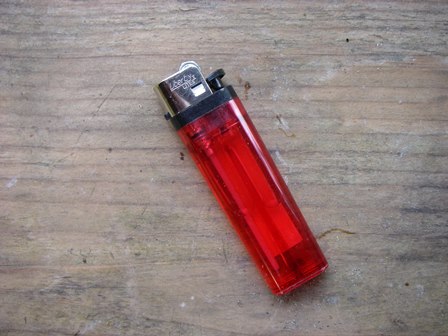
Now we’re getting into the high tech survival fire starters! The modern lighter started out as an outgrowth of early firearms technology, which used a flint lock or wheel lock to strike sparks onto gunpowder charges. A lighter combines a mechanical striker (usually a thumb operated wheel) with a fuel source (usually butane nowadays) to produce a small sustained flame. Some companies sell ‘storm proof’ lighters that have a very hot jet of flame (similar to a blow torch). These can be useful in wet and windy conditions.
Pros: Requires zero skill to operate and is cheap, light and portable. There’s really no reason NOT to include one of these in your backpack.
Cons: Lighters have moving mechanical parts which can fail if they are mistreated or damaged. They also have a limited fuel supply and can be rendered inoperable if the striking mechanism becomes wet. Some lighters get around this by having electric strikers that are not susceptible to moisture.
Be More Prepared For Your Next Outdoor Adventure!

Don't leave without knowing these six essential survival skills. Our free survival mini guide reveals the strategies of:
- Shelter & fire to prevent the number one cause of death
- Obtaining clean water to avoid life-threatening dehydration
- Common wild survival foods and other critical skills!

7. Battery and Steel Wool
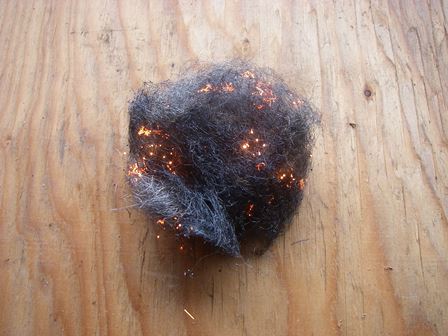
This technique is a neat trick you can pull out in an emergency. Simply take a piece of steel wool (the finer the fibers the better) and touch both contact points of a 9-volt battery to it.
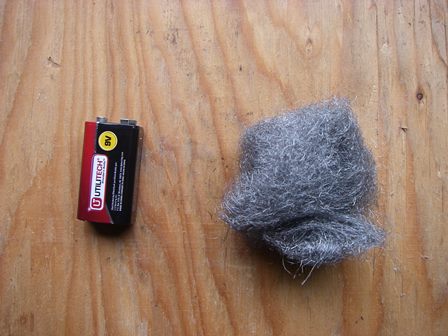
The steel wool will form a simple circuit with the battery as the power source and the electrical resistance of the wool will cause it to smolder. This is basically the same technology that powers incandescent lightbulbs but without the protective sphere of inert gas.
Pros: You might have these things with you on a camping trip, but not likely. Requires zero effort or skill. Lightweight, waterproof and packable.
Cons: The steel wool does not produce much of a real flame, so you need to have some nice dry tinder to really get a fire going with this technique. The steel wool and the battery need to be stored separately for obvious reasons.
Survival Fire Starters: Accelerants
Now let’s talk about the other survival fire starters: accelerants. These are the substances and tools that can help you make a small fragile flame into a large roaring campfire and improve your odds of survival. Once again, I’ll talk about them in order from the most primitive to the most modern.
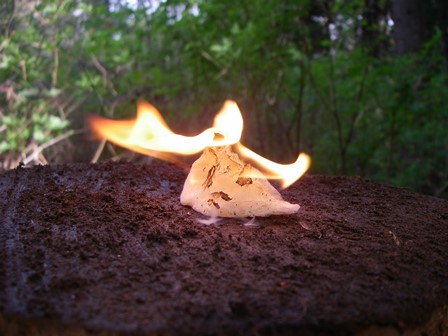
1. Pitch and Fat wood
Pitch
is composed of flammable resins produced by trees. The best pitch for
survival fire starters typically comes from trees in the Pine (Pinus)
family. Pine trees depend on fire to create a healthy habitat and to
aid in the dispersal of their seeds.
Pitch can be gathered from live trees by looking for old wounds or broken branches. The wound will ‘bleed’ sap which then hardens, sometimes forming large chunks.
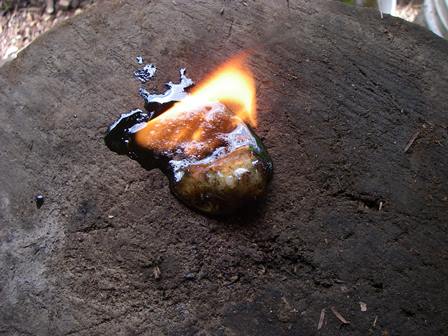
Pitch sometimes requires fairly prolonged exposure to a source of open flame in order to ignite, but once it combusts it will burn for a long time, which can really help to dry out and burn wet wood in a survival situation.
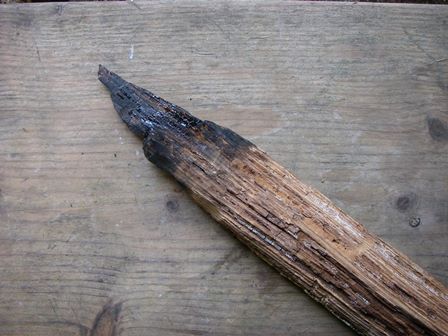
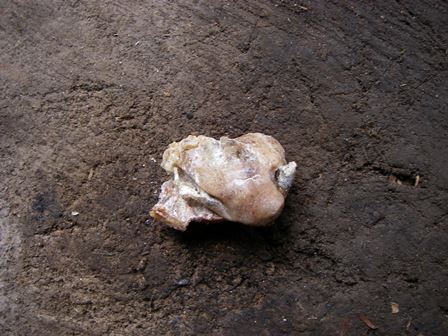
Another way to use pitch is to find ‘Pitch wood’ or ‘Fat wood’. When a tree dies the flammable resins in its sap settle over time, coming to rest at the base of the tree near the heartwood. The resins completely saturate the wood fibers causing them to expand and harden. It takes much longer for pitch wood to break down so you can usually find it by digging into an old stump that is at the right stage of decomposition. It will have a strong pitch smell, almost like turpentine.
When pitch wood burns it gives off a sooty looking black smoke and holds a flame for much longer than a piece of regular wood.
Pros: Cheap (it’s free!) and very effective in wet or cold conditions. Its all natural and can be found in the environment around you.
Cons: Pitch is not very packable since it is sticky and its viscosity varies according to the temperature.
2. Wax and Fibers
There are a lot of DIY survival fire starters out there that utilize wax (typically candle wax or paraffin wax). Tallow (rendered beef or mutton fat) was used to make molded candles for thousands of years. Modern candles are made primarily from bees wax, plant based waxes or petroleum based waxes. In many ways wax acts like a man-made form of pitch and when combined with a fibrous material it can produce a long lasting accelerant for survival fire starting.
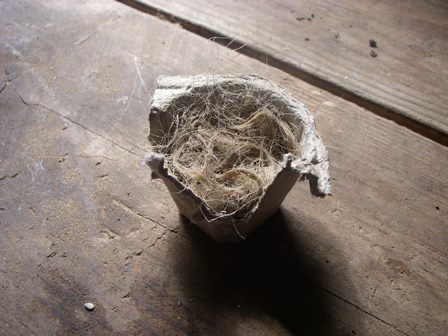
A common version of the ‘wax and fiber’ fire starter can be made by filling an egg carton with drier lint, saw dust or cotton balls and then covering the whole thing with paraffin wax. The wax ensures that the fibers stay dry even in wet conditions and helps to prolong the burn time of the fibers.
One of my favorite survival fire starters in this vein is the ‘shepherd’s lighter’ which consists of a 6 inch piece of jute twine coated in paraffin wax.
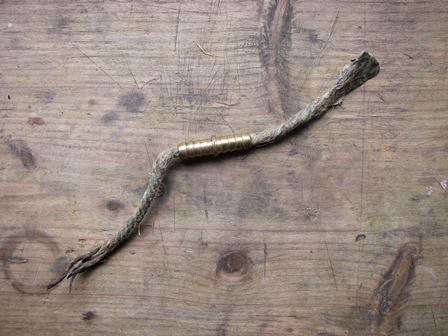
The wax coated twine is then inserted into a fitted brass hose connector (a common item used in household plumbing). The end of the jute can then be frayed out to expose the flammable fibers and ignited with a flint and steel spark.
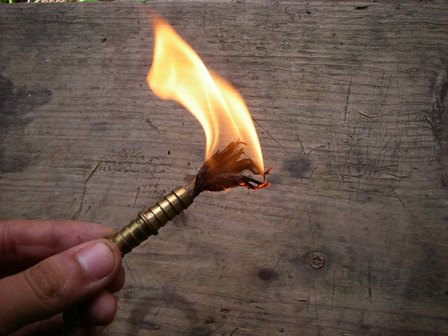
The brass hose connector acts as a choke that allows you to control the size of the flame on the shepherd’s lighter. When you are done with it simply slide the hose connector over the end of the flame to snuff it out.

Pros: Wax is cheap and easy to find. It also seals out moisture so it works well in wet conditions. It doesn’t require a lot of flame to get going.
Cons: You need to prepare these ahead of time and carry them with you into the woods.
3. Gauze and Hand Sanitizer
Both gauze and hand sanitizer are commonly found in first-aid kits and they also make great survival fire starters.
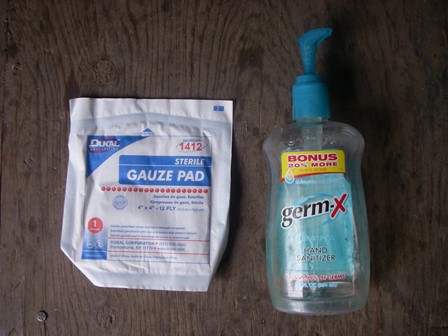
Simply take a thick, folded over square of gauze and saturate it with hand sanitizer. Hand sanitizer is basically just jellied alcohol so it burns with a hot, clean flame.
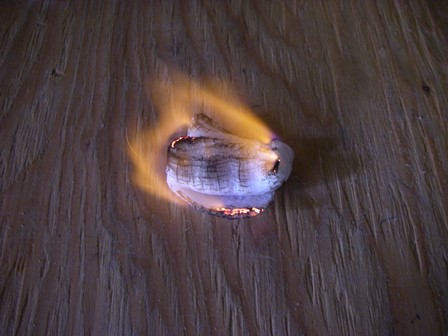
The gauze acts like a wick and provides material for the flame to burn besides the alcohol fumes.
Pros: Both of these items are already found in any self-respecting hiker’s back pack. It’s always great when you can have tools that serve multiple functions.
Cons: There is no moisture protection (unless your first aid kit comes in a waterproof bag).
4. Petroleum Jelly and Cotton balls
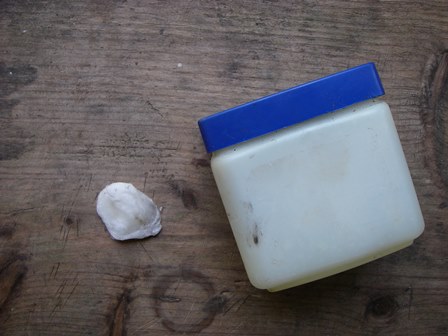
These survival fire starters are cheap and easy to make. Simply buy a bag of cotton balls and a jar of petroleum jelly from your local drug store. Melt the petroleum jelly and dunk the cotton balls in so that they absorb it. Alternatively you can even just roll the cotton balls around in the room temperature jelly, but this is slightly less effective.
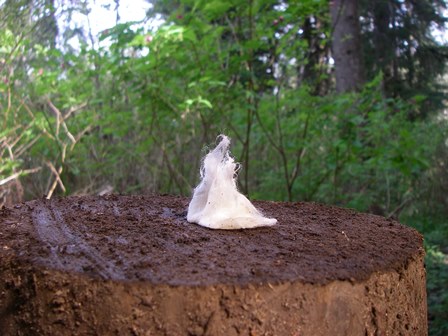
To use them, pull a few fibers out to make a simple wick and apply flame. These survival fire starters will burn for upwards of 20 minutes each.
Pros: These guys are cheap, lightweight and very easy to make and use. They are also waterproof due to the petroleum jelly.
Cons: Petroleum jelly is viscous at room temperature so you definitely need to bag the cotton balls up to prevent the jelly from getting all over everything. Also, you need to make these ahead of time.
In Conclusion
Survival fire starters are an essential part of any back woods camping gear or emergency kit. Once again, make sure you have at least 3 different ways of starting a fire with you whenever you put yourself in a position to potentially be lost for an extended period of time in the wilderness.
By the way, if you enjoyed this article then you'll love our survival mini guide. You'll discover six key strategies to staying alive in the outdoors plus often-overlooked survival tips. We're currently giving away free copies here.
Additional Resources on Survival Fire Starters:
Check out how to make fire from a can of coke and a chocolate bar!
Learn about survival fire starters at our Wilderness Survival Courses

About the Author: Jeremy Williams is an experienced wilderness skills educator and wildlife tracker. He was an instructor at Alderleaf. Learn more about Jeremy Williams.
Return from Survival Fire Starters back to Wilderness Survival Articles
Is The Essential Wilderness Survival Skills Course Right for You? Take the "Online Survival Training Readiness" Quiz
See for yourself if this eye-opening course is a good fit for you. It takes just a few minutes! Get your Survival Training Readiness Score Now!
Grow Your Outdoor Skills! Get monthly updates on new wilderness skills, upcoming courses, and special opportunities. Join the free Alderleaf eNews and as a welcome gift you'll get a copy of our Mini Survival Guide.
 The Six Keys to Survival: Get a free copy of our survival mini-guide and monthly tips!
Learn more
Wait. Before you leave...
Don't forget your Survival Mini Guide.
It's free.
Be more prepared for your next outdoor adventure! Discover six essential survival skills. Join our newsletter and get a free copy of the guide as a welcome gift!
Your privacy is our top priority. We promise to keep your email safe!