How to Dry Herbs
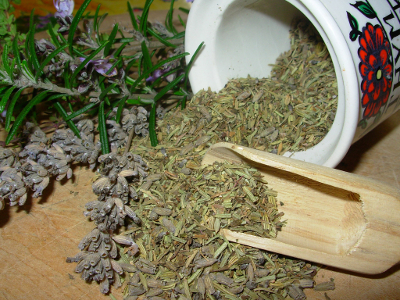
Learning how to dry herbs is a great skill. Herbs are an important part of many people’s daily diets. Most folks are familiar with the dried herbs found in shakers that line the shelves of any supermarket. Some examples of these herbs are thyme, oregano and basil. All these herbs are used for bringing flavor and depth to our favorite recipes!
You may also have, at one time, enjoyed a nice cup of tea either from a tea bag or from a loose tea blend. Some examples of my favorite tea herbs are lemon balm, peppermint, chamomile and nettle. Herbs bring sweet, bold flavors and vibrant colors to any hot or cold beverage.
Did you know that dried herbs not only bring flavor and color to our favorite dishes and beverages, but also contain many medicinal and beneficial properties that can help nourish and support the whole body?
Well they do! And the less processing that takes place the more flavor and beneficial properties stay in the finished product.
When we purchase herbs from the store we have little to no idea when the herbs were harvested, how they were processed or what method was used for drying the herbs out.
Growing or foraging your own herbs is one of the best ways to really know where your herbs come from and to receive the highest amount of flavor and medicinal benefits possible. Picking herbs at their peak whether from the wild or your own garden can enhance any food dish and support many ailments, but once an herb has been harvested how do you dry it out?
How to Dry Herbs: Step One - Prep
Once you have your harvest of plants taken ethically from the wild or plucked from your garden, decide if you need to give your plants a good rinse. If you are harvesting roots you definitely will! For me I choose not to rinse off flowers, buds or leaves especially if they look very clean. If you choose to rinse your herbs, rinse lightly in cool water, then pat dry with rag or paper towel.
Then, depending on the part of the herb you are drying, decide if you need to do any other preparations. With roots, bark and other tough parts I like to chop the material into smaller piece so that they may dry faster and all the way through the tough outer layer. However, depending on the drying method that you choose you may be able to keep the roots whole. Although in my experience this takes longer and is more difficult to tell when the roots have dried completely.
With the more fragile parts of the plants such as flowers, buds, and leaves I like to pluck them from the stem and dry them out whole. You can leave the stems on depending on what method of drying you choose to use.
How to Dry Herbs: Step Two - Drying
Choose a drying method from the detailed descriptions below that best fits the plant part you are drying, as well as the season and what you have access to. When drying has concluded store herbs in a glass container then put in a cool dry place. For more information on how to store dried herbs read the section “Storage.”
How to Dry Herbs: Flowers, Buds & Leaves VS Roots, Bark & Seeds
There are many useful methods for drying out herbs, from the fresh blossoming flowers to the thick moisture rich roots. Drying is simply the process of extracting all of the moisture out of the herbs you are choosing to process. Different parts of a plant may need different methods of drying to provide the highest quality dried herb.
The following are different methods and techniques for drying the more fragile parts of a plant such as the flowers, leaves and buds.
- Drying Rack (Indoor or Outdoor)
- Hang Drying (Indoor or Outdoor)
- Paper Bag Drying
- Dehydrator
When drying the tougher woodier parts of a plant such as the roots, stalks, seeds or bark the below methods are the most efficient.
- Conventional Oven
- Drying Rack (Indoor or Outdoor)
- Hang Drying (Indoor or Outdoor)
- Dehydrator
Drying Methods
How to Dry Herbs: Drying Rack (Indoor or Outdoor)
What is a drying rack?
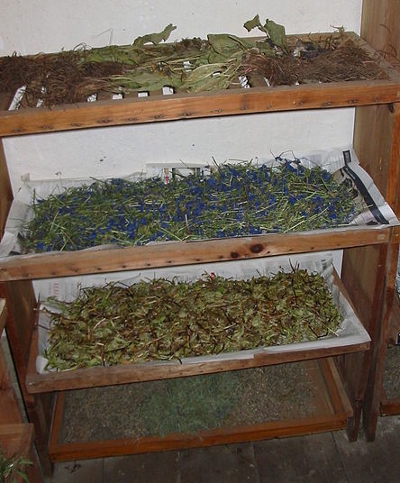
A drying rack is a rack that can be purchased or easily built for drying a variety of plant material. These racks generally consist of many shelves stacked on top of each other leaving enough space between each rack for sufficient air flow. I prefer to use racks that have a screen so that you can lay out any size of plant on the screen and still get the air flow needed. Air flow is the most important aspect of this method! Without it the plants may get too moist and mold instead of dry!
Although a drying rack generally consists of many shelves, you can buy or build a rack that has only one shelf if you only dry a few herbs at a time.
Indoor Drying Racks: Drying racks placed indoors can work beautifully and leave your home smelling of the herbs you are drying. Make sure that you place your rack somewhere that gets adequate air flow, is free of dust or animal hair and is possibly near a sunny window. If you are drying fragile herbs do not put in direct sunlight for long periods, they may lose their color. If you are worried about dust or hair, lay cheese cloth or paper towels over your herbs!
Outdoor Drying Racks: Drying racks can work well indoors, but I personally love to set my racks filled with freshly picked herbs outside on warm sunny days. The wind and heat from the sun will help speed up the process of drying and can give your herbs a lovely glow. Again, I choose not to place my herbs in direct sunlight as this has, on more than one occasion, caused some of my herbs to lose their vibrant color. DO NOT place your herbs outside to dry if it is wet, your herbs may not dry and just end up moldy. Additionally, if you are worried about overnight moisture then bring your rack of herbs inside at sunset.
(Hint: Make sure to check on herbs that have been set on a rack outside. To much direct sun may cause your herbs to lose a bit of their color.)
A drying rack may be the simplest way to dry herbs and when used properly, allows your herbs to dry in a, sometimes slow, but natural process. This process may take a week or longer for herbs to dry. You will know herbs are dried completely when they crumble in your hands. Note: Roots, bark and seeds may not crumble and will take longer to dry. Trust your instincts and if unsure giving your harvest a few more days of drying never hurts! The rack drying method can be used to dry both the more fragile parts of herbs and plants as well as the tougher parts.
How to Dry Herbs: Hang Drying (Indoor or Outdoor)
What does it mean to hang dry?
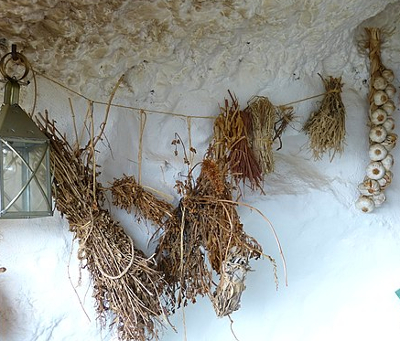
Exactly what is sounds like! In this method of drying you take your harvest and bundle it up. Then you tie any form of twine, rope or even wire around the stalks, stems or small end of the roots and hang them in a warm place that gets plenty of air flow. Make sure when you hang your bundle the leaves or any other foliage that is attached is facing down!
In my experience this method of drying works best for longer and larger plants. Plants that have stalks such as nettle, rosemary, sage, long wisps of tough willow and even thick roots such as dandelion if they are long enough!
If you are drying inside and you are worried about dust you can place a paper bag with some slits in it around your herbs. Placing a paper bag around your herbs then bundling it up and cinching it around the stalks is an easy way to do this. A rubber band works great for holding the bag tight.
When drying in this way two things are important to note:
First, depending on what you are drying it may take a week or longer to dry all the way. For me I generally hang dry for a minimum of two weeks.
Second, air flow is vital, so I prefer to hang in a space that can get air flow from both sides as opposed to hang drying flush against a wall.
Drying is complete when your herbs or chosen plants are crunchy to the touch or look withered and a bit shriveled. The lack of moisture will shrink your plants just a bit. If you are unsure if your plants have dried all the way, it is always safe to let them sit a few extra days. Remember, drying time will be different depending on what you are drying and how moist the plants were when you harvested them. Again, use your best judgement and listen to your instincts.
The hang drying method is best for foliage that is attached to long stalks, long roots and really anything that can be bundled up and hung easily. This is not saying you can’t hand dry smaller herbs such as lemon balm, just that it is more tedious to try and bundle these smaller herbs.
Be More Prepared For Your Next Outdoor Adventure!

Don't leave without knowing these six essential survival skills. Our free survival mini guide reveals the strategies of:
- Shelter & fire to prevent the number one cause of death
- Obtaining clean water to avoid life-threatening dehydration
- Common wild survival foods and other critical skills!

How to Dry Herbs: Paper Bag Drying
You can dry herbs in a bag?
Yes! This method of drying is my favorite when foraging in the wild away from home. Paper bags are small and easy to fit in a pack. This is a very simple method and can be done easily on the go! If you live on the road, in a small space or just like to take frequent walks in the wilderness this could be your most convenient drying method!
Drying herbs in a paper bag is simple. All you do is harvest your herb or plant and place it in your paper bag. Then once you have your harvest, place your bag in the dash board of a car and let the sun as well as the bag work to dry your herbs out. Paper bags are perfect because they are more breathable than plastic sacks and will allow moisture to leave your herbs.
There are a few key things to note when using the paper bag method.
First, DO NOT put a large number of wet herbs in your bag. This can cause mold and your herbs will not dry.
Second, I choose not to roll or fold my bag up. I like to leave the mouth cracked a bit to allow the moisture to escape. If you roll it up to tight and your herbs are very moist, again they may not dry.
Finally, this method works the best if you have a sunny, hot area to leave your bag - such as on the dashboard of your car on a hot sunny day, or in a window sill that gets plenty of sun and heat.
This is a method that I highly suggest you use if you have some sun to place the bag in, or a very warm area in your house.
I only use paper bag drying for leaves, flowers, bud and seeds. I find bark and roots do not dry very well in the bag.
How to Dry Herbs: Conventional Oven
Will my herbs burn in the oven?
Yes and no. The conventional oven may be the most accessible method of drying for many people. This is a method that can go oh so right, or very wrong.
Generally, I like to use this method only for roots, stalks, bark or other thick plant parts. You can use an oven to dry out your more fragile foliage, but there is a high risk of burning, discoloration or loss of smell, so be careful!
The first thing to do when drying in the oven is to make sure you have done all the prep work necessary, washing, chopping up, etc before placing herbs on the sheet and putting in the oven. If washing and rinsing took place pat dry your herbs well.
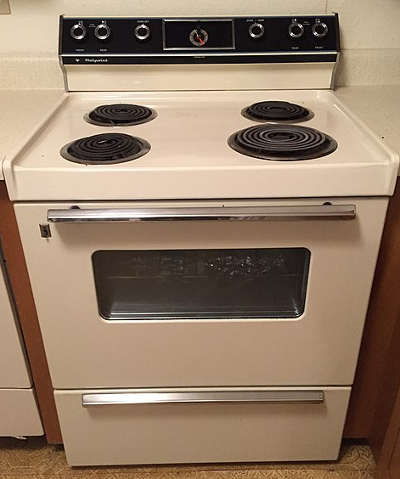
Next, gather your harvest and lay them out onto a cookie sheet, or pan of some sort in a single, flat layer. I personally like to use a Pyrex or glass dish for drying instead of an aluminum pan. Place in the oven on the lowest possible setting or around 120 degrees Fahrenheit and LEAVE THE OVEN DOOR OPEN! This is important! I have burned to many herbs to count by thinking that my oven temperature is low enough and then shut the door. Next thing I know, discolored herbs or roots that burnt instead of drying out! You can leave the full door open or just a crack, I have had good results with both. See what works for you! After a few rounds of drying you may be able to find the sweet spot with your personal oven and be able to shut the door completely. If you can make this work that is wonderful!
Herbs drying this way can take as little as 30 minutes or require 3+ hours. It is all going to depend on what you are drying and the moisture content. The key is to keep your eye on your oven. Check your herbs often, flip your herbs if necessary and do not be afraid to grab your herbs and test them to see if they are dry. Drying in this way takes practice and will take a few batches to master. Once you have dried similar herbs a few times in this way you may not need to keep such a close eye on them.
Once you are happy with your herbs and they are completely dried, pull them out and set them on the counter. I like to let mine sit for 10-15 min before putting them in a jar or processing them further to reduce the chance of condensation.
This is a great method for drying herbs or roots in the colder months when the house may be a bit chillier, or if you need your herbs on the fly! During the summer months, if possible, I like to use other methods of drying.
The conventional oven method works best for roots, stalks and tougher plant material. While fragile foliage can be easily burnt, loose their color or loose their flavor all together! When working with fragile herbs keep your eyes on your oven!
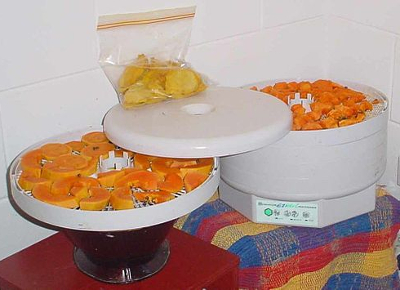
How to Dry Herbs: Dehydrator
Isn’t a dehydrator used for fruits or meats only?
No way! While a dehydrator is excellent for pulling the moisture out of fruits and meats it can also pull the moisture out of all your beautiful herbs!
Dehydrators are designed to make the drying process as simple and as low maintenance as possible. There are so many dehydrators on the market that have their own manual and user tricks and tips that it would be impossible to describe in detail how to use each one!
For that reason, I will keep it simple.
Generally, with dehydrators you have a tray or multiple trays you can place your herbs on. Like the other methods of drying if you have rinsed your herbs pat them dry before you place them in the trays.
Once all your herbs are placed in the trays follow the given instructions of YOUR dehydrator. Drying times can vary greatly depending on the herbs you are choosing to dry, as well as the settings on your dehydrator. 1 to 4 hours seems to be the general time frame for most herbs.
For more information on how to dry herbs in a dehydrator check out: https://theherbalacademy.com/dry-fresh-herbs-using-a-dehydrator/
How to Dry Herbs: Step Three: Storage
No matter what method of drying you choose storing your herbs should all be done in a similar fashion. If you are not processing your plants any further after drying is complete than storage is simple.
If possible place herbs, once cooled down, in a colored glass container. If you only have clear glass containers those will work great to. The point of the color is to help keep the light off your herbs to extend their shelf life.
Once all herbs are in glass containers make sure you label them properly, no fancy labels necessary, unless you have them!
After labeling is complete store herbs in a cool dark place like a cupboard or a hutch with a curtain pulled over it.
Soon enough you’ll have plenty of herbs stored away for teas, cooking, homemade products and so much more!
Herbs and other wild plants can not only add so much flavor to our lives, but truly work wonders on the whole body. Drying herbs is one of the best ways to ensure you have herbs all year, long after your harvest.
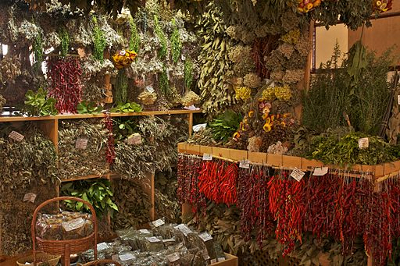
Want to practice drying and saving herbs but don’t have an herb garden?
No problem!
Go to your local market and pick up some fresh organic herbs and give it a go!
A few easy herbs to start with are:
- Thyme
- Rosemary
- Sage
- Basil
Additional Resources on How to Dry Herbs:
The Herbal Medicine Maker’s Handbook by James Green
Foraging and Feasting by Dina Falconi
https://blog.mountainroseherbs.com/drying-herbs
If you want to learn more about how to work with herbs and other plants like the ones mentioned in this article check out Alderleaf’s Wild Edible and Medicinal Plants Courses. Here you will learn about foraging, wild edible plants, medicine making and so much more!
By the way, when you're out foraging, it's important to know how to stay safe in the outdoors, especially if you were to get lost. Right now you can get a free copy of our mini survival guide here, where you'll discover six key strategies for outdoor emergencies, plus often-overlooked survival tips.

About the Author: Emily Nealley is an experienced outdoor educator and herbalist. Emily wrote articles while working at Alderleaf. Learn more about Emily Nealley.
Return from How to Dry Herbs back to Wild Plants Articles
Is The Essential Wilderness Survival Skills Course Right for You? Take the "Online Survival Training Readiness" Quiz
See for yourself if this eye-opening course is a good fit for you. It takes just a few minutes! Get your Survival Training Readiness Score Now!

Grow Your Outdoor Skills! Get monthly updates on new wilderness skills, upcoming courses, and special opportunities. Join the free Alderleaf eNews and as a welcome gift you'll get a copy of our Mini Survival Guide.

 The Six Keys to Survival: Get a free copy of our survival mini-guide and monthly tips!
Learn more