Cattail Plants:
Friend of the Forager, Bushcrafter, and Basket-Maker
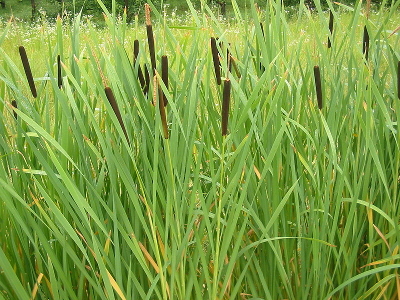
Cattail Plants by Leah Houghton
Have you ever driven past a marsh, only to see a forest of tall stalks that seem to be topped with hot dogs? If the answer if “yes!” then you’ve seen a cattail stand!
Cattails are an easy to find plant that is a friend of the forager, herbalist, bushcrafter/survivalist, and basket-maker.
In this article, you will learn how to identify cattail (and tell it apart from it’s toxic look-alike!), which parts are edible at what time of year, how to use the ‘fluff’ and other parts for survival purposes, PLUS step-by-step instructions on how to make a plaited cattail basket - an excellent bushcraft project!
Cattail – Typha latifolia
Family: Typhaceae (Cattail Family)
Habitat: Wetlands, marshes, ponds, ditches, lakes.
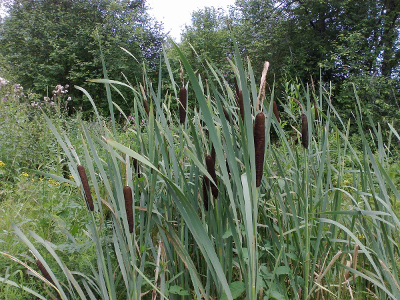
Key Characteristics:
- 1” wide sword-like leaves with NO central rib, no branching
- Leaf sheaths join tightly around stalk at base
- Leaves are slightly rounded (D shape in cross-section) and spongy
- Up to 10 ft tall
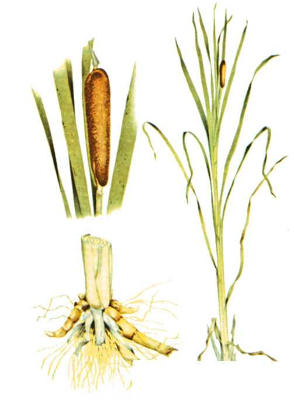
- Each plant contains male and female flowers. The male flowers at the top of the spike disintegrate after releasing pollen, and the tiny female flowers form a dark, dense sausage shape.
- The seeds disperse on the wind via their cottony fluff
- Spreads by tuberous rhizomes immersed in water or mud
Year-Round Edibility:
Euell Gibbons, famed author of Stalking the Wild Asparagus, appropriately nicknamed it the “supermarket of the swamp” as there are edible parts year-round!
Corms (appear late summer, persist through winter and turn into shoots in spring): The small, horn shaped shoots of next year’s growth at the base of the stalk, above the rhizome. Clean, peel outer leaves to tender core and cook.
Young stalks (Spring): edible up to 2-3 feet tall. Break off from rhizome and cook, then peel outer leaves to white core.
Rhizomes: (Highest starch levels occur in fall-early spring) 1) Whole: Dig out of the mud, CLEAN very well. Cook over a fire until all water is cooked out and outside is charred. Peel away outside and gnaw on starchy interior. 2) Flour: Cut into pieces and soak in water, allowing starch to settle at bottom of a bowl. Drain water, allow starch to dry. Makes a great addition to ash cakes or pemmican.
Green flower heads (before pollen, late spring): Can be cooked and eaten like corn on the cob.
Pollen: (summer) Harvest pollen by gently bending stalk and placing a bag around the male flowering part and shake. Do not break stalk, or female flower will not be able to grow. Pollen can be used as a flour supplement, added to soups to thicken, or added to any food to add nutrition and protein.
Please note: Cattails can absorb toxins from polluted waters. Do not harvest in areas with heavy traffic, runoff, or other pollution. Rhizomes MUST be washed and cooked thoroughly to avoid contracting water-borne illnesses like giardia.
Be More Prepared For Your Next Outdoor Adventure!
Don't leave home without knowing these six essential survival skills. Our free survival mini guide reveals the strategies of:
- Shelter & fire to prevent the number one cause of death
- Obtaining clean water to avoid life-threatening dehydration
- Common wild survival foods and other critical skills!

Medicinal Uses:
- Viscous substance between leaves near base of the stalk is a topical analgesic for burns and an antiseptic for minor wounds and insect bites.
- Root poultice soothing for burns, poison ivy, infections and ulcers.
Utilitarian Uses:
Dead seed head can be used for:
- Tinder, but is best paired with another tinder such as fluffed cedar bark, dried cottonwood cambium, or dried leaves, as it tends to smolder better than catch on fire quickly.
- Insulation: Pack in between 2 sewn-together blankets to make a primitive sleeping bag, or simply stuff between a base layer and a sweater (along with leaves and debris) to provide extra warmth in a cold-weather survival situation.
- A torch: Soak in tallow (rendered animal fat) for a torch that can last as long as 6 hours.
Leaves can be used for:
- Making baskets, which are beautiful are can be vital in a survival situation.
- Making sleeping pads to stay warm at night.
- Making sitting pads for keeping off the wet ground.
- Weaving doors for shelters to keep out the wind.
- Making cordage! A MUST KNOW skill for any survivalist.
Stalks can be used as a handdrill spindle for making fire from friction.
 Poisonous look-alike Yellow Flag Iris
Toxic Look-alike: Yellow-Flag Iris (Iris pseudacorus)
- Mildly toxic if ingested
- Leaves fan out from base instead of coming together in one stalk
- Leaves contain a hard central rib
- Leaves are flat instead of slightly rounded and are not spongy
Step-by-Step Plaited Cattail Basket Instructions
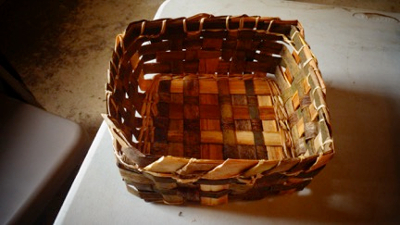
Materials: Cattails, raffia or other fiber/cordage, a 6-inch long piece of 4x4 lumber to use as a form, scissors
1) Harvest leaves no later than mid-fall (late summer/early fall is easier). Wade into a marsh and cut leaves at base, leaving rhizomes intact for next year. Harvest ethically, by taking no more than one third of the stalks in a stand. They are an important food and shelter source for many creatures!
2) Lay the leaves out to dry. When completely dry, hang up indoors to avoid mold. This step allows the plants to shrink before basket construction so the basket can stay tight instead of shrinking and having holes.
3) When you're ready to make the basket, soak the leaves in warm water for 30 minutes or cold water no longer than overnight. Soaking the leaves makes them pliable, so they will bend without cracking or breaking.
4) Gently separate leaves from the round stalk. (Save the stalks, they can be used to make a sleeping mat!)
5) Start the basket weaving process by laying out the leaves so the thicker ends alternate with the thinner ends (as shown in the twining diagram below). This way your basket will be even instead of chunky on one side. The amount of leaves needed depends on the size of your basket form (square piece of wood, or anything square or rectangular around which you can weave your basket, we use 4x4 blocks that are about six inches tall as forms)
 Over-under weave
6) Weave the leaves in an over/under fashion to form the base of the basket. The weave should be as tight as possible, wiggle the pieces so there are nearly no holes. These leaves woven to form the base will be called the warps once they are bent upwards as part of forming the sides of the basket.
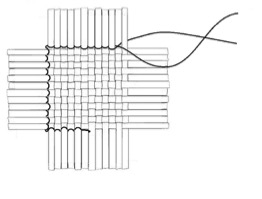 Twining diagram
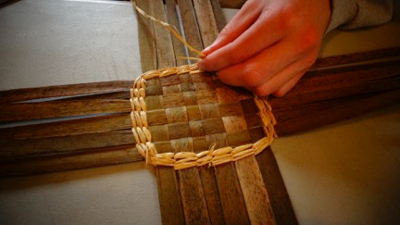 Twining photo
7) Once the base of basket is the same size as your form, begin twining with raffia. Take 1 piece of raffia, and wrap it over one warp so the center is on the cattail and the two sides are hanging down in front and in back. -Twist the raffia so the piece in front goes to the back and the piece in back comes to the front.
- Repeat around every warp, going around the basket a total of 2-3 times.
- Once finished, tuck ends down into previous raffia. (Avoid knots in basketry)
8) While your warps are still damp enough to bend without cracking, set your wood block form on your basket base and gently bring your warps up vertically against the form. Rubber band or tie them at the top.
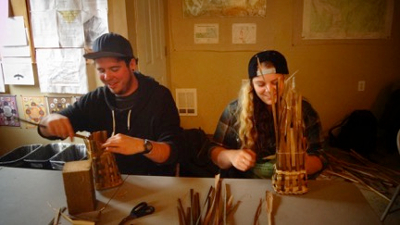 Weaving the wefts
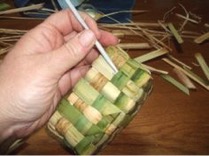
9) With a new piece of cattail (called the weft) begin weaving over and under each warp.
- When you reach the place you began, trim the end and tuck it in to where you started.
- Repeat for each row, alternating where you begin so the pattern appears over/under and so the start/end points are spread out throughout the basket (avoiding bulky sections.)
- Use a pencil/stick to gently push each row of weft tightly against the previous rows.
10) The Rim:
a) Once the basket has reached the desired height, unband the warps and trim them to ~2” long. Insert a backing strip behind one warp.

b) Insert a piece of raffia in between strips 2 and 3 so a 3” tail hangs to the inside of the basket and the longer part sticks out BELOW the backing strip. Then wrap the raffia diagonally across strip 3 and over the backing strip so it hangs down again. (Diagonal lash)

c) Fold strip 3 down at an angle so it lays flat against the backing strip.

d) Bring strip 4 in FRONT of the backing strip and the folded strip 3.
e) Wrap the raffia diagonally across strip 4, over top of the backing strip and then behind it so it is hanging down, just as in step 10b. (diagonal lash)
f) Fold strip 4 down at an angle so it lies against the backing strip, just as in step 10c.

g) Continue in this manner around the edge of the entire basket.
h) When you reach the starting point, trim the end and tuck it into the first folded strip. Pull the raffia tight and tuck down into the basket.

And now you get to celebrate your beautiful basket!
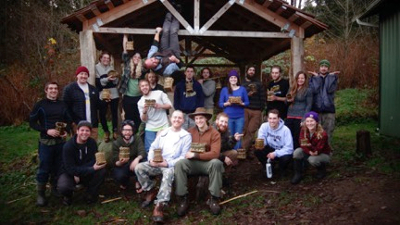 Cattail Basket Class
Feel free to send in photos of your cattail harvests or baskets, we’d love to see them!
By the way, when you're out foraging, it's important to know how to stay safe in the outdoors, especially if you were to get lost. Right now you can get a free copy of our mini survival guide here, where you'll discover six key strategies for outdoor emergencies, plus often-overlooked survival tips.
Additional Resources:
Cattail information on the USDA NRCS website
Related Courses:
Wild Edible & Medicinal Plant Courses at Alderleaf

About the Author: Leah Houghton is an experienced outdoor educator. She wrote articles while teaching at Alderleaf. Learn more about Leah Houghton.
Return from Cattail Plants back to Edible & Medicinal Plants Articles
Is The Essential Wilderness Survival Skills Course Right for You? Take the "Online Survival Training Readiness" Quiz
See for yourself if this eye-opening course is a good fit for you. It takes just a few minutes! Get your Survival Training Readiness Score Now!

Grow Your Outdoor Skills! Get monthly updates on new wilderness skills, upcoming courses, and special opportunities. Join the free Alderleaf eNews and as a welcome gift you'll get a copy of our Mini Survival Guide.

 The Six Keys to Survival: Get a free copy of our survival mini-guide and monthly tips!
Learn more